Setup Stripe
Getting Stripe setup for your project is quick and easy, but requires you to think a bit about how you'd like to charge for your app.
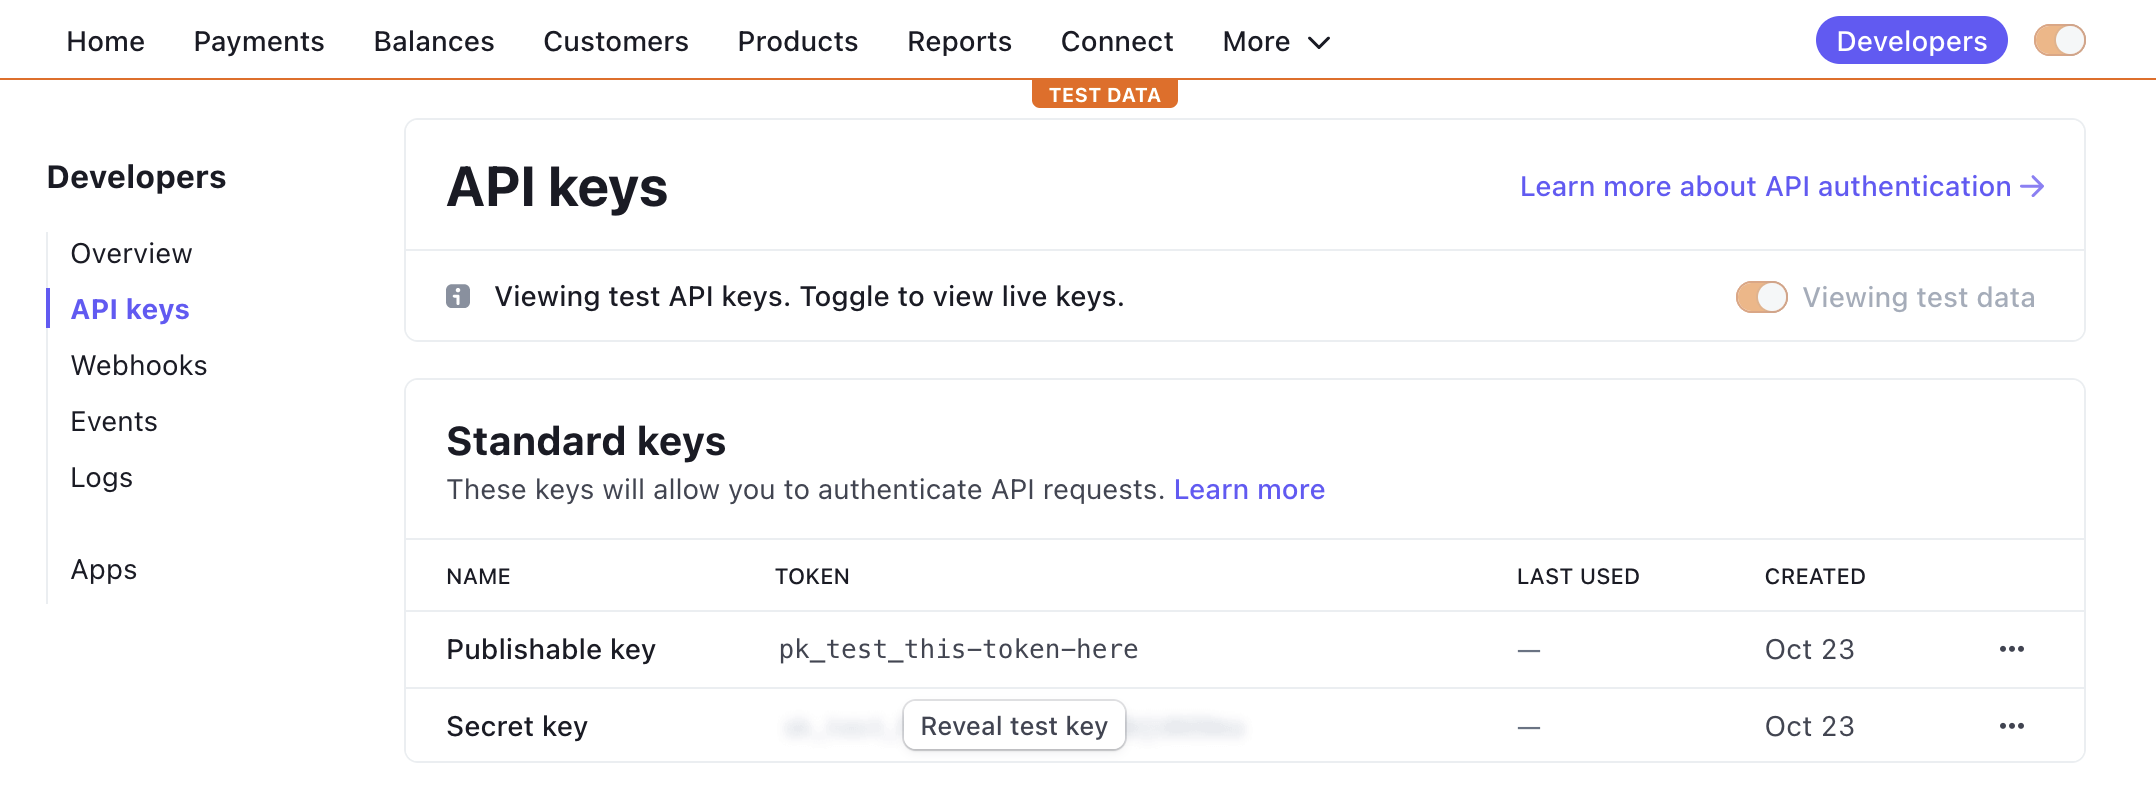
Getting your Stripe key
You'll need to get your Stripe private key out of your dashboard and add them to your environment variables.
The public token is not used, since we leverage checkout sessions and customer dashboards directly.
For local development, make sure you're in TEST mode. Consult the environment variables page for more information.
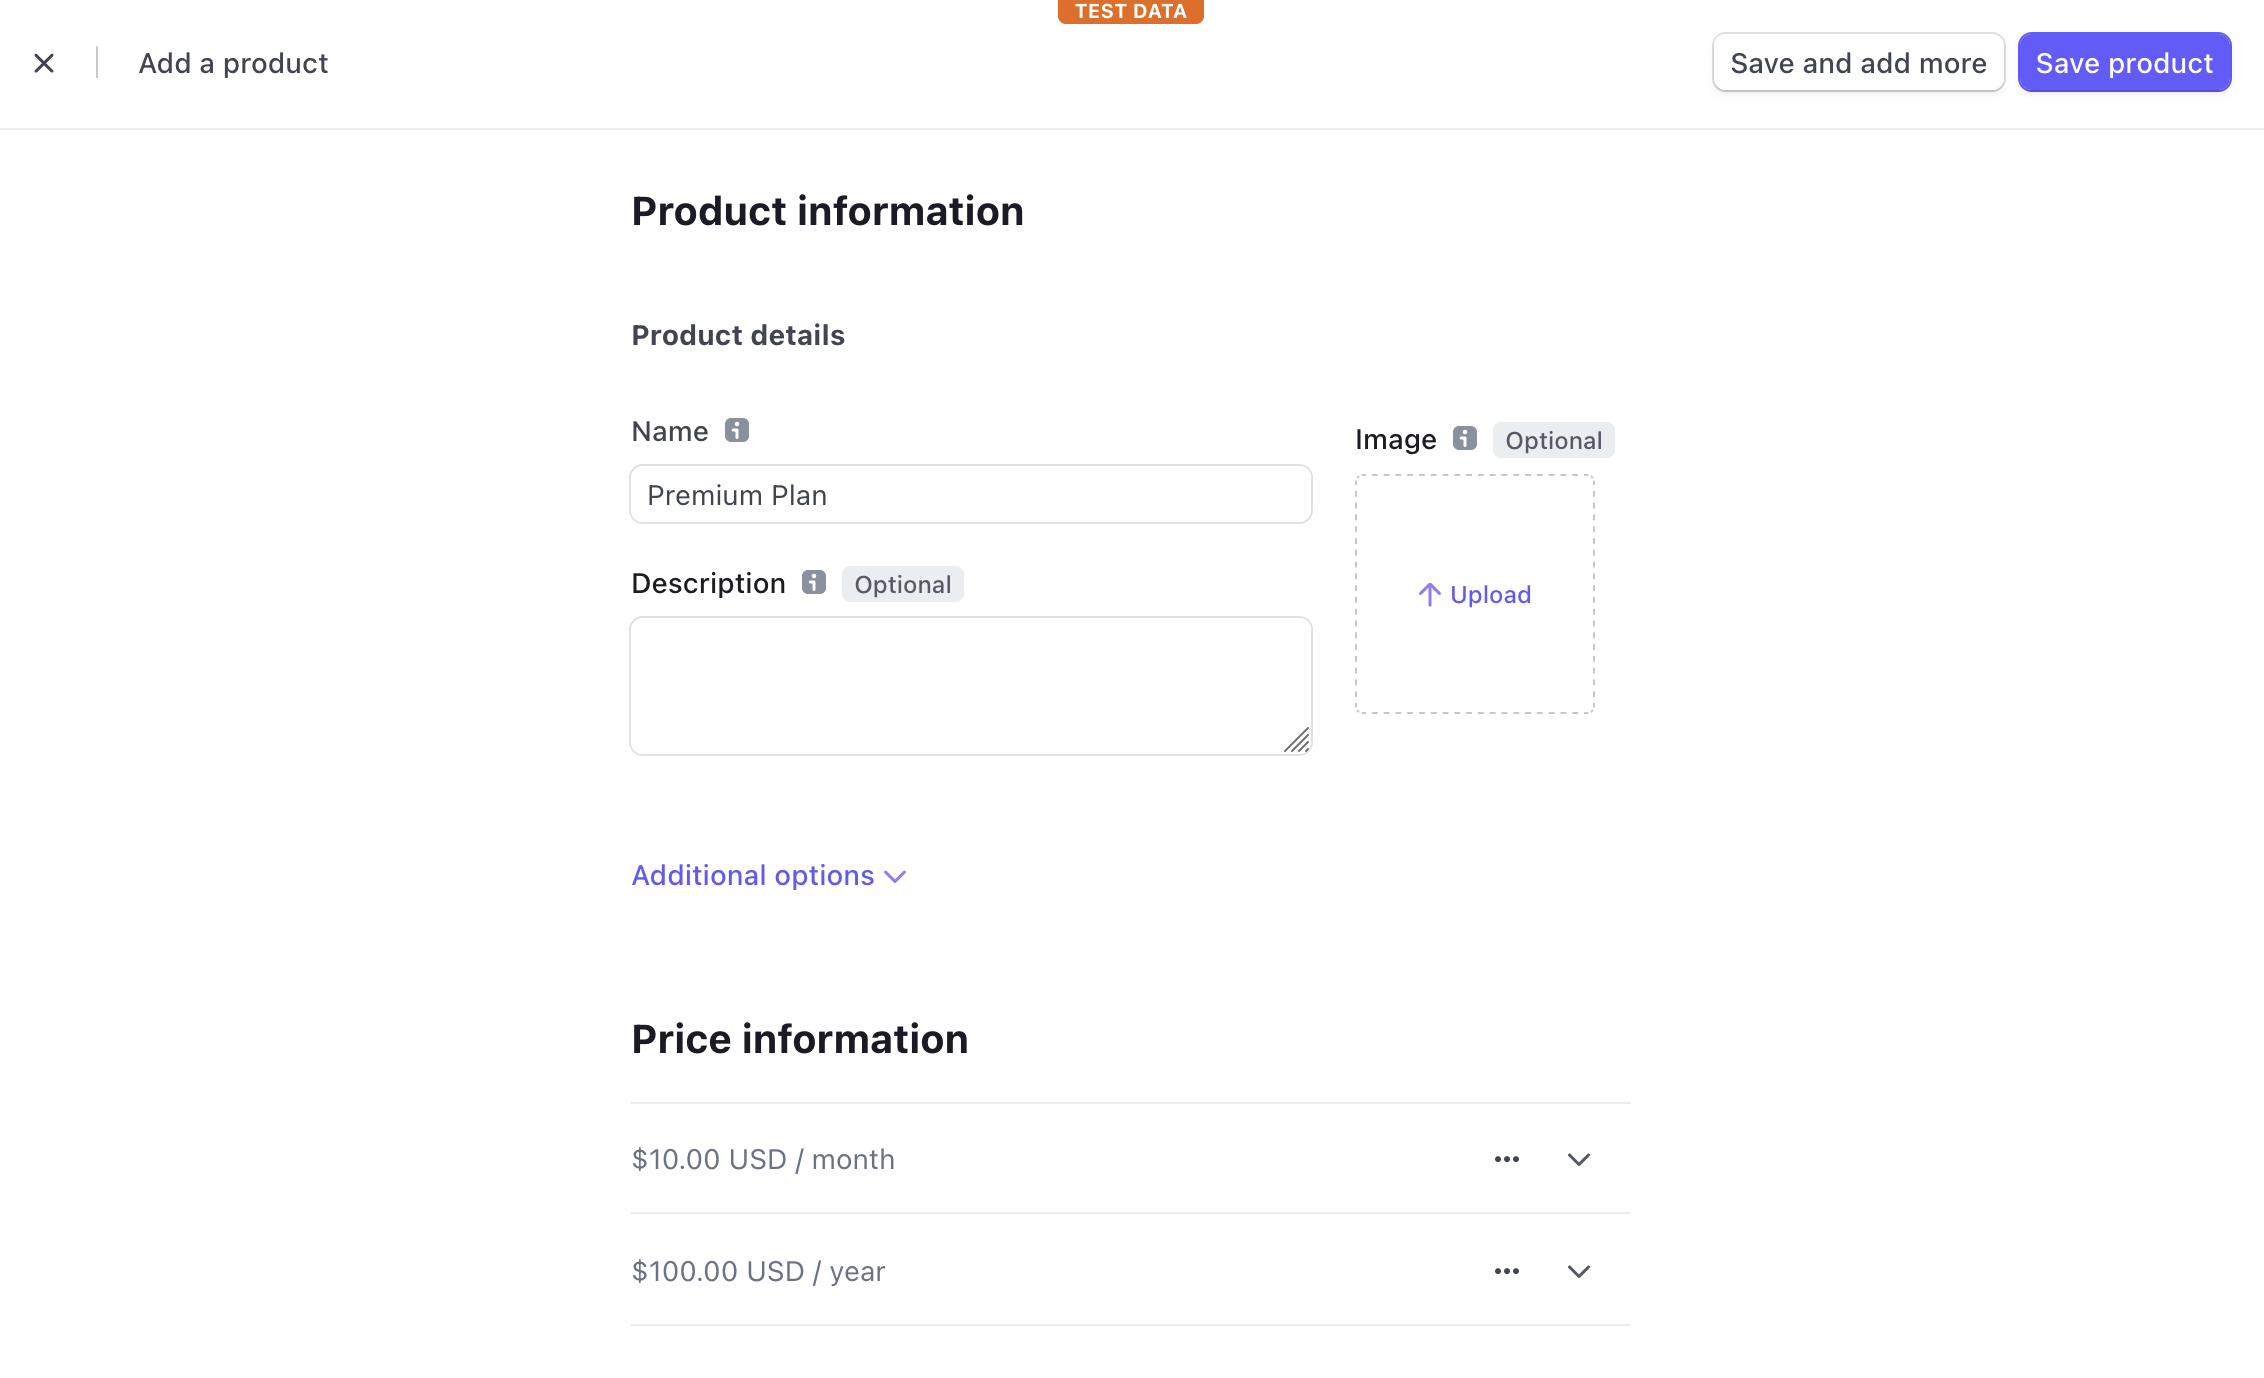
Setting up your Stripe products
We use Stripe products to track the different plans you offer. Typically, you'd create a product for each "tier" that you offer - then create prices for monthly and yearly.
You also have the option of creating one-time plans. Basejump does not enforce any specific payment options, we just honor the subscription status out of Stripe.
For example, here we've created a Premium plan for $10/month, or $100/year.
Sync your Stripe products
Once you've created your products, you'll need to sync them to your database. You can do this by running the following command:
(Sometimes you have to run this twice)
yarn sync-stripe
Setup your platform defaults
Basejump allows you to set a default plan and trial period for new users. Set these options in your basejump.config table.
They have a few different consequences based on how you configure it
Default users into a plan with a trial period (recommended)
- Users can access your app immediately
- Users do NOT need to enter a credit card
- Accounts expire, prompting users to enter a credit card at the end of the trial
- Users can opt into a different plan on their account settings page
Default users into a plan without a trial period
- Users are blocked from access until they provide a card
- Users can change their plan when providing a card IF you enable this in Stripe
- Users can opt into a different plan on their account settings page
Default users into a free plan
- Users can access your app immediately
- Users do NOT need to enter a credit card
- Users can opt into a different plan on their account settings page
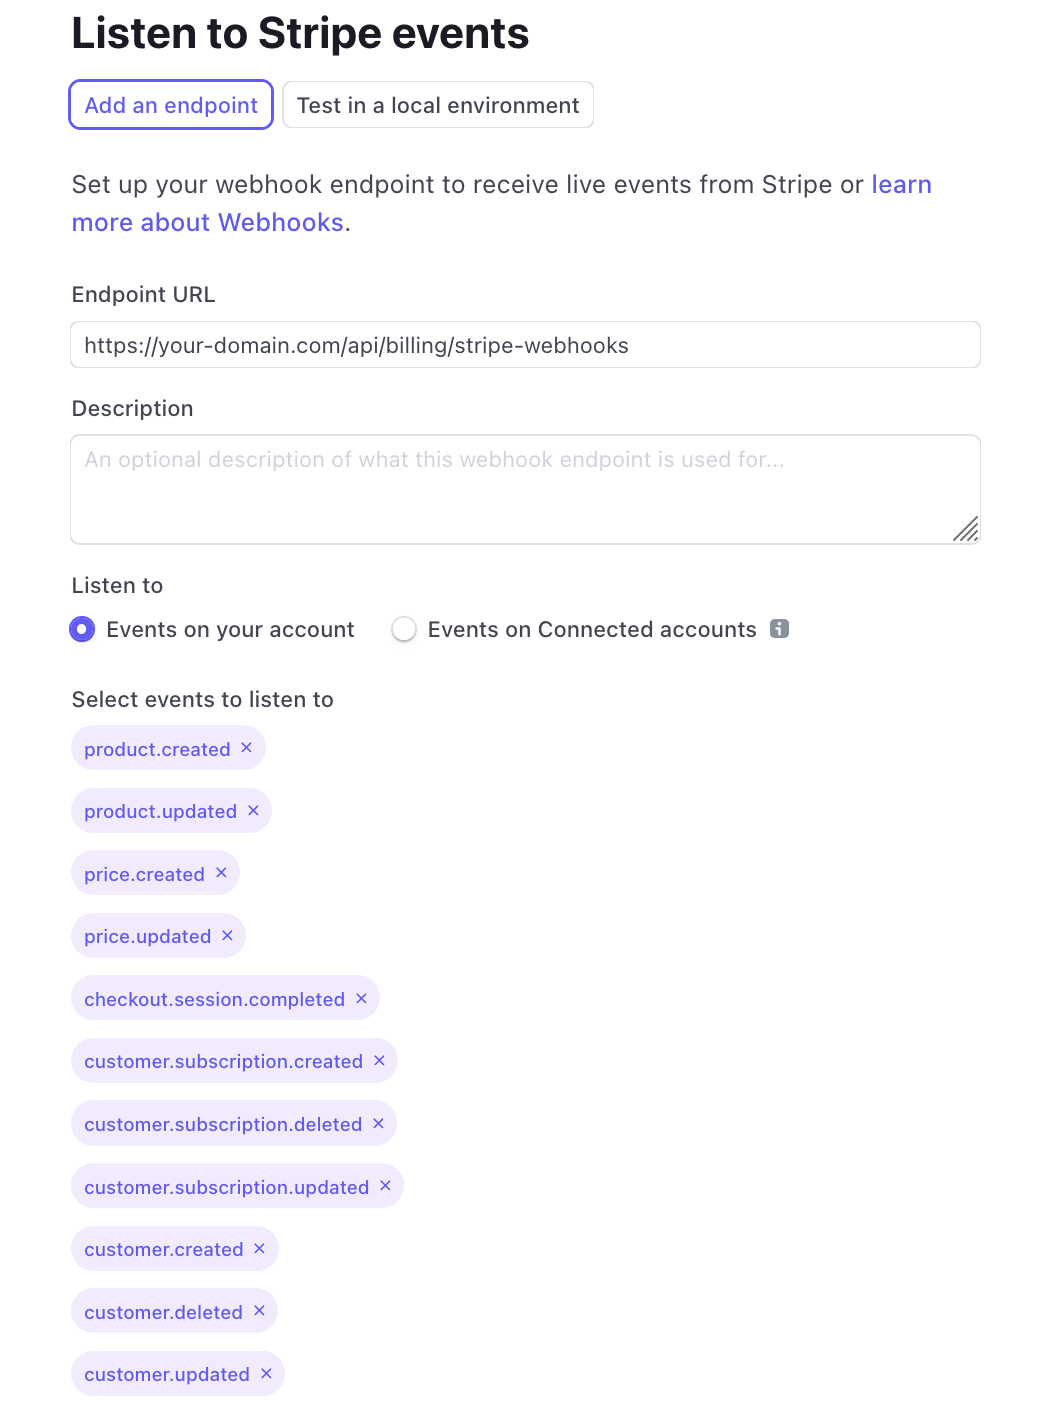
Setup your Stripe webhooks
This is mostly important for production, but when you're ready you need to set up Stripe webhooks. That allows Basejump to keep track of account statuses.
First, head to your Stripe dashboard, click on the Developers tab and select Webhooks.
- Endpoint URL:
https://<your-domain>/api/billing/stripe-webhooks - Listen To:
Events on your account - Events:
product.createdproduct.updatedprice.createdprice.updatedcheckout.session.completedcustomer.subscription.createdcustomer.subscription.updatedcustomer.subscription.deletedcustomer.createdcustomer.updatedcustomer.deleted